3 mín. lestur
Úr teikningu í tölvuleik með gervigreind
Gömul teikning, málsettir veggir og einn aukavaskur. Svona lét ég gervigreind teikna í CAD og smíða íbúð sem hægt er að ganga um í þrívídd.
Ég tók gamla, skannaða íbúðarteikningu af teikningavef Reykjavíkurborgar og lét gervigreind teikna hana upp í CAD. Svo gekk ég um íbúðina í þrívídd, með lítið kort í horninu. Eins og tölvuleikur, nema verðlaunin eru málsettir milliveggir.
Hvernig tókst það þegar gervigreindin á stundum erfitt með að segja hvað einn veggur er langur?
Sér hún teikninguna þína?
Það fer eftir því hvernig skjalið er lesið. Í dæminu í myndbandinu skilaði PDF-vinnslan textanum áfram, en myndir og tákn urðu eftir. Gervigreindin gat lesið „bílskúr, 30 m²“ án þess að sjá sjálfan bílskúrinn.
Mynd af teikningunni hjálpar, en að þekkja vegg er ekki það sama og að mæla hann. Til þess vildi ég gefa gervigreindinni mælitæki.
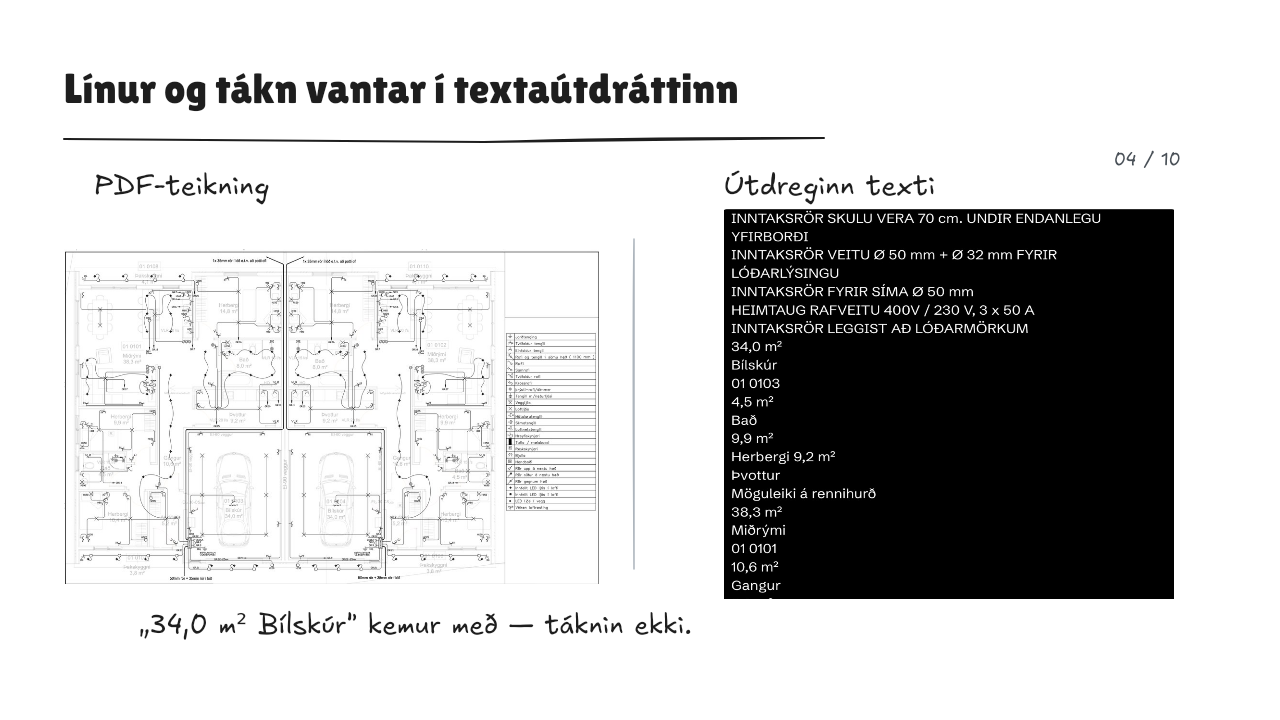
1. Úr skannaðri teikningu í CAD
Ég tengdi gervigreindina við OpenCAD Studio með MCP. Hugsaðu um MCP sem tengið sem gerir henni kleift að nota önnur forrit, í þessu tilfelli til að teikna og mæla.
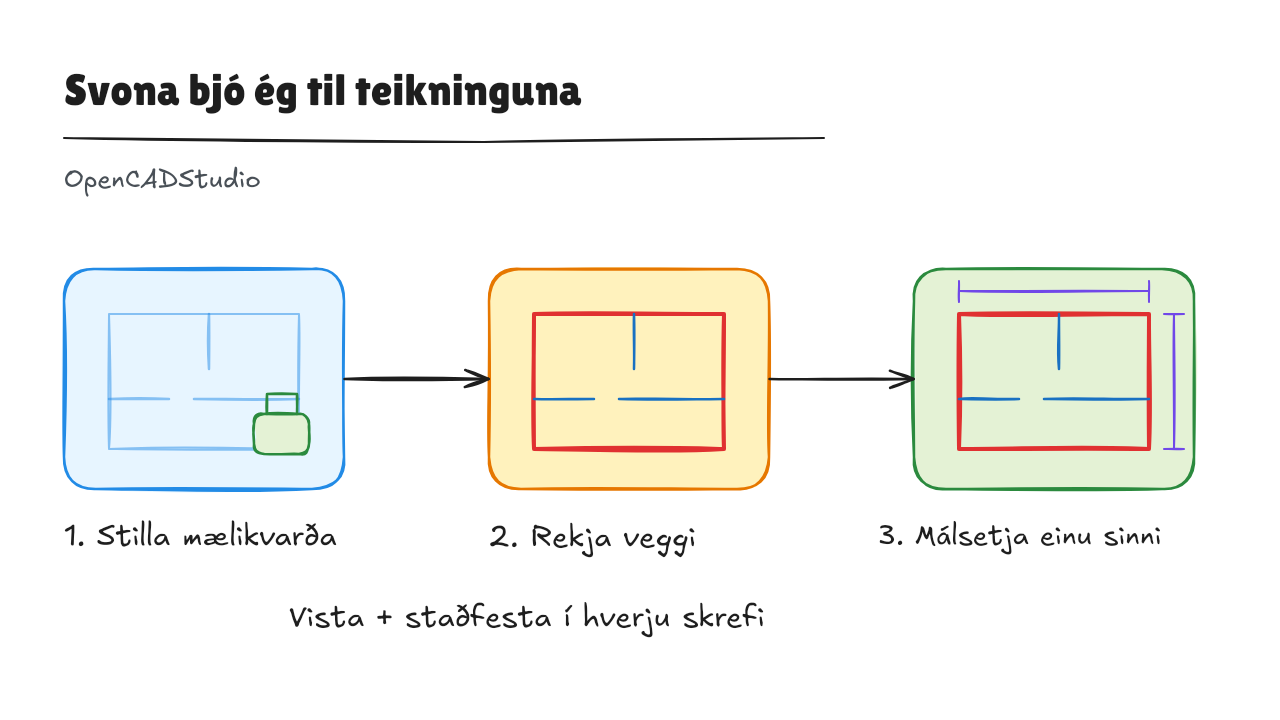
Lykillinn var að láta hana vinna í litlum skrefum:
- Stilla einingar í millimetra.
- Rekja og teikna einn vegg í einu.
- Bera lengdir og reiknað flatarmál saman við merktu fermetrana á teikningunni. Leiðrétta og endurtaka.
- Bæta málsetningum við í lokin.
Þannig varð til hringur: teikna, mæla, bera saman, laga. Miklu betra en eitt risastórt „gerðu þetta allt“.
Fyrirmælin mín: CAD
Vectorize architectural drawings through the OpenCAD MCP. Follow the requested scope and clearly identify estimated geometry.

  Workflow

  1. Inspect the session and schemas. Call ocs_sessions, confirm the active document, and inspect tool schemas before constructing requests. Do not guess field names: TEXT uses value.
  2. Create a document if needed. Run new alone. Refresh document references afterward; do not mix document creation with subsequent operations in a batch.
  3. Calibrate. Prefer printed dimensions or a scale bar. Use room areas only as an approximate cross-check, accounting for uncertain boundaries. Keep the pixel-to-drawing coordinate conversion in one reusable script.
  4. Configure dimension styles first. Use set_properties on dim_styles; dimension-style fields are not available as dim* sysvars. Match text and arrow sizes to drawing units. Later style changes did not update existing dimensions in testing.
  5. Add the underlay. Use embed_image with explicit width and lock_layer, then zoom_extents.
  6. Create geometry. Batch compatible entity operations. entities_create creates named layers automatically; do not create dummy entities just to establish layers.
  7. Check geometry before dimensioning. Capture the drawing, check alignment and labels, and hide _XREF to inspect vectors independently. The raster may obscure lines.
  8. Create dimensions once. Establish style, intended layer, and placement beforehand. Avoid deleting dimensions: testing found orphaned DIMASSOC objects that caused save verification to fail. If this occurs, rebuild in a fresh document.
  9. Verify and save. Run save_verified as a standalone call after each major stage. Treat a save as successful only when verification passes.

  Verification and tool caveats

  - Use ocs_capture with view: "extents" and delivery: "inline"; resource delivery failed in testing.
  - Toggle underlay visibility through set_properties on the layers collection at /flags/off.
  - Check label fit, geometry alignment, dimensions, and layer visibility. Adjust lineweights when needed.
  - Do not rely on clayer to assign dimension layers; it failed in testing. Explicit reassignment produced conflicting property/query results, so report unresolved discrepancies.
  - Avoid empty handle arrays and unnecessary capture annotations on dense drawings.
  - A failed save may still leave a file at the target path. Mark it untrusted; never present it as a verified deliverable.

  Scope and reporting

  Include only requested elements. Identify estimated boundaries, inferred dimensions, omitted details, and unresolved issues.

  Confirm the active document when resuming work. The document disappearance in the original test was user-induced, not evidence of routine session loss.

  Report the verified output path and any remaining limitations.
2. Og svo löbbum við bara inn
Næst lét ég gervigreindina skrifa þrívíddarsenu með Three.js sem hægt er að skoða í vafra.
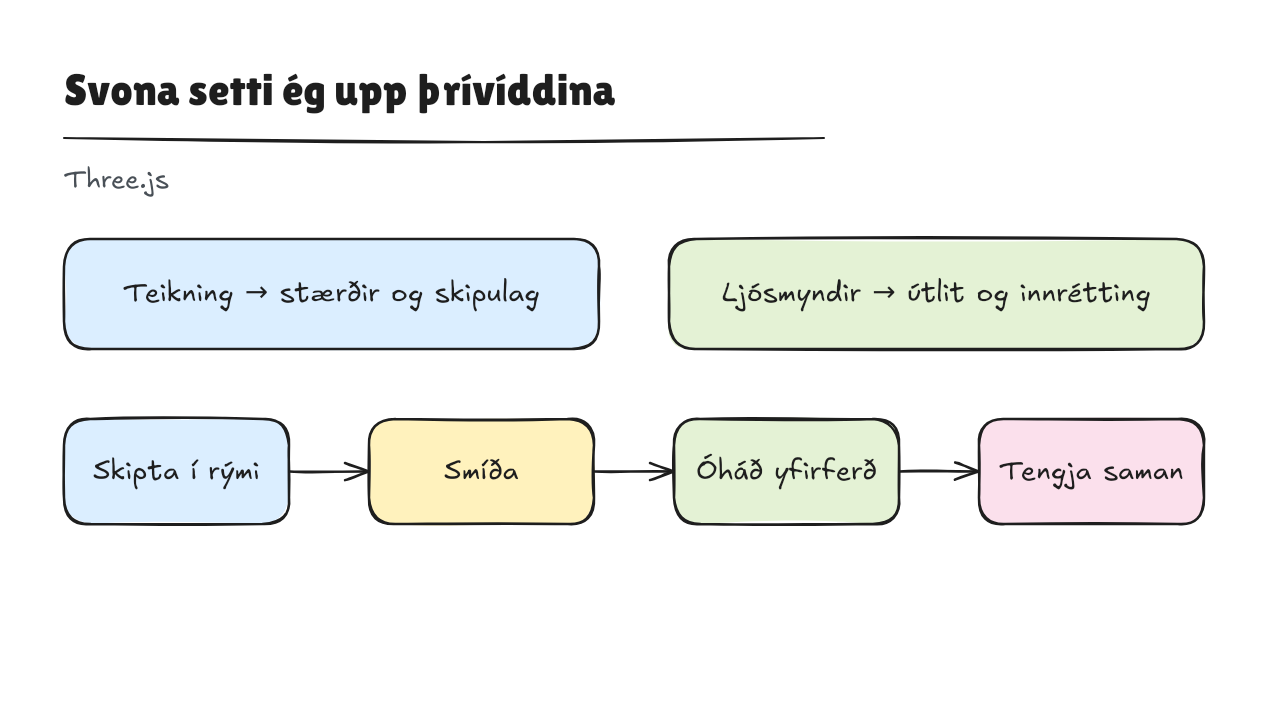
Ég bað hana að skipta íbúðinni í rými og smíða hvert þeirra fyrir sig. Önnur gervigreind fór yfir útkomuna og gagnrýndi það sem passaði illa. Að lokum voru rýmin tengd saman svo hægt væri að ganga um, með upprunalegu teikninguna sem kort í horninu.
Fyrirmælin mín: þrívídd
Build a browser-based Three.js walkthrough of the house using the supplied floor plan and photos.

  Use the plan for scale, room layout, wall thicknesses, openings, and circulation. Use the photos for finishes, furniture, lighting, and visible details. Prioritize explicit dimensions over visual estimates; flag conflicting or missing information rather than silently guessing.

  Split the house into independently reviewable sections, such as rooms and connecting spaces. Establish shared coordinates, dimensions, materials, and navigation conventions so the sections fit together consistently.

  For each section:
  1. Assign a builder the relevant plan, photos, and shared conventions.
  2. Have the builder implement it and capture screenshots from viewpoints matching the reference photos as closely as possible.
  3. Assign a separate critic with fresh context. Give them the references and screenshots, without the builder’s explanations. Have them assess geometry, materials, furniture, lighting, and omissions, then identify the three largest visible discrepancies.
  4. Have the builder make one correction pass based on that feedback.

  Perform exactly one critique and at most one correction pass per section. Do not restart reviews or loop until approval. Treat the photos as the visual target, not something to “beat.”

  Integrate the sections and verify scale, alignment, doorways, collision handling, and browser navigation. Fix integration defects without restarting visual reviews.

  Deliver the working site with a brief list of remaining mismatches, estimates, and details that could not be established from the supplied evidence.
Allt fullkomið? Spyrðu aukavaskinn
Veggirnir og málsetningarnar komu vel út í tilrauninni. Innréttingarnar voru aðeins ævintýragjarnari: gervigreindin bætti meðal annars við vaski og færði niðurfall. Gott að taka yfirferð áður en einhver mætir með borvélina.
Prófaðu þetta á íbúð sem þú þekkir vel. Þá sérðu fljótt bæði hvað tekst vel og hvar gervigreindin tekur sér skáldaleyfi.
Tólin í myndbandinu: OpenCAD Studio, MCP og Three.js.
Ég er að smíða Fenra til að minnka handavinnu og auka yfirsýn í byggingarverkefnum. Viltu fleiri svona tilraunir? Skráðu þig á póstlistann hér fyrir neðan.